
A check engine light means the vehicle’s onboard diagnostic system detected a problem that may affect the engine, transmission, emissions controls, or related electronics. A steady light usually calls for timely diagnosis. A flashing light, rough running, smoke, a strong fuel smell, overheating, low oil pressure, or a major loss of power can make the situation urgent.
The light cannot identify a failed part by itself. Even a diagnostic trouble code is only a starting point: it identifies the system and test that reported a fault, not necessarily the component that should be replaced. The safest response is to note how the vehicle behaves, check the owner’s manual, retrieve the stored codes, and confirm the cause through appropriate testing.
Quick decision table
| What you see | What it may indicate | Safest next step |
|---|---|---|
| Light flashes while the engine runs | A severe fault such as an active misfire may be occurring | Reduce risk immediately, reach a safe location, shut the vehicle off, and arrange prompt professional help |
| Steady light with shaking, smoke, overheating, fuel odor, or major power loss | The warning is accompanied by a potentially serious symptom | Stop when it is safe; do not continue merely because the light is steady |
| Steady light and the vehicle feels normal | The computer detected a fault, but there may be no immediate drivability symptom | Check the fuel cap and manual, then arrange a code scan and diagnosis soon |
| Light appeared after refueling | A loose, damaged, or incorrectly seated fuel cap is one possibility | Stop safely, switch off the engine, inspect and reseat the cap as directed by the manual; diagnose the vehicle if the warning remains |
| Light went out by itself | The fault may be intermittent or no longer present | Do not assume the problem is repaired; stored or pending codes may still help explain it |
| Light is on before an emissions inspection | The vehicle may fail or be rejected depending on MIL and monitor status | Do not clear codes merely to extinguish the light; repair the cause and verify readiness under state rules |
Important: Dashboard symbols and manufacturer instructions vary. Always follow the owner’s manual for the exact year, make, model, and powertrain. If warning lights are red, the temperature or oil-pressure warning is active, or the vehicle is unsafe to control, prioritize a safe stop and roadside assistance.
What the check engine light actually means
The check engine symbol is commonly called the malfunction indicator light, or MIL. It is part of the vehicle’s onboard diagnostic system. On most U.S. light-duty vehicles from model year 1996 onward, the second-generation system is known as OBD-II.
OBD-II continuously or periodically checks systems that affect emissions and powertrain operation. When a monitored value or test falls outside the expected range, the computer can store a diagnostic trouble code and command the MIL on. The U.S. Environmental Protection Agency explains that the warning may be labeled Check Engine, Service Engine Soon, or shown as an engine-shaped symbol.
That does not mean the engine itself is always mechanically damaged. A warning can originate from an emissions leak, ignition misfire, sensor circuit, fuel-control problem, transmission-related fault, or another monitored condition. It also does not mean the vehicle has identified the exact repair.
The bulb check at startup
The light normally illuminates briefly when the ignition is switched on before the engine starts. This bulb check confirms that the indicator can illuminate. If it never appears during startup, consult the owner’s manual and have the system inspected; an inoperative MIL can also matter during an emissions inspection.
Steady versus flashing check engine light
The behavior of the light is one of the first facts to record.
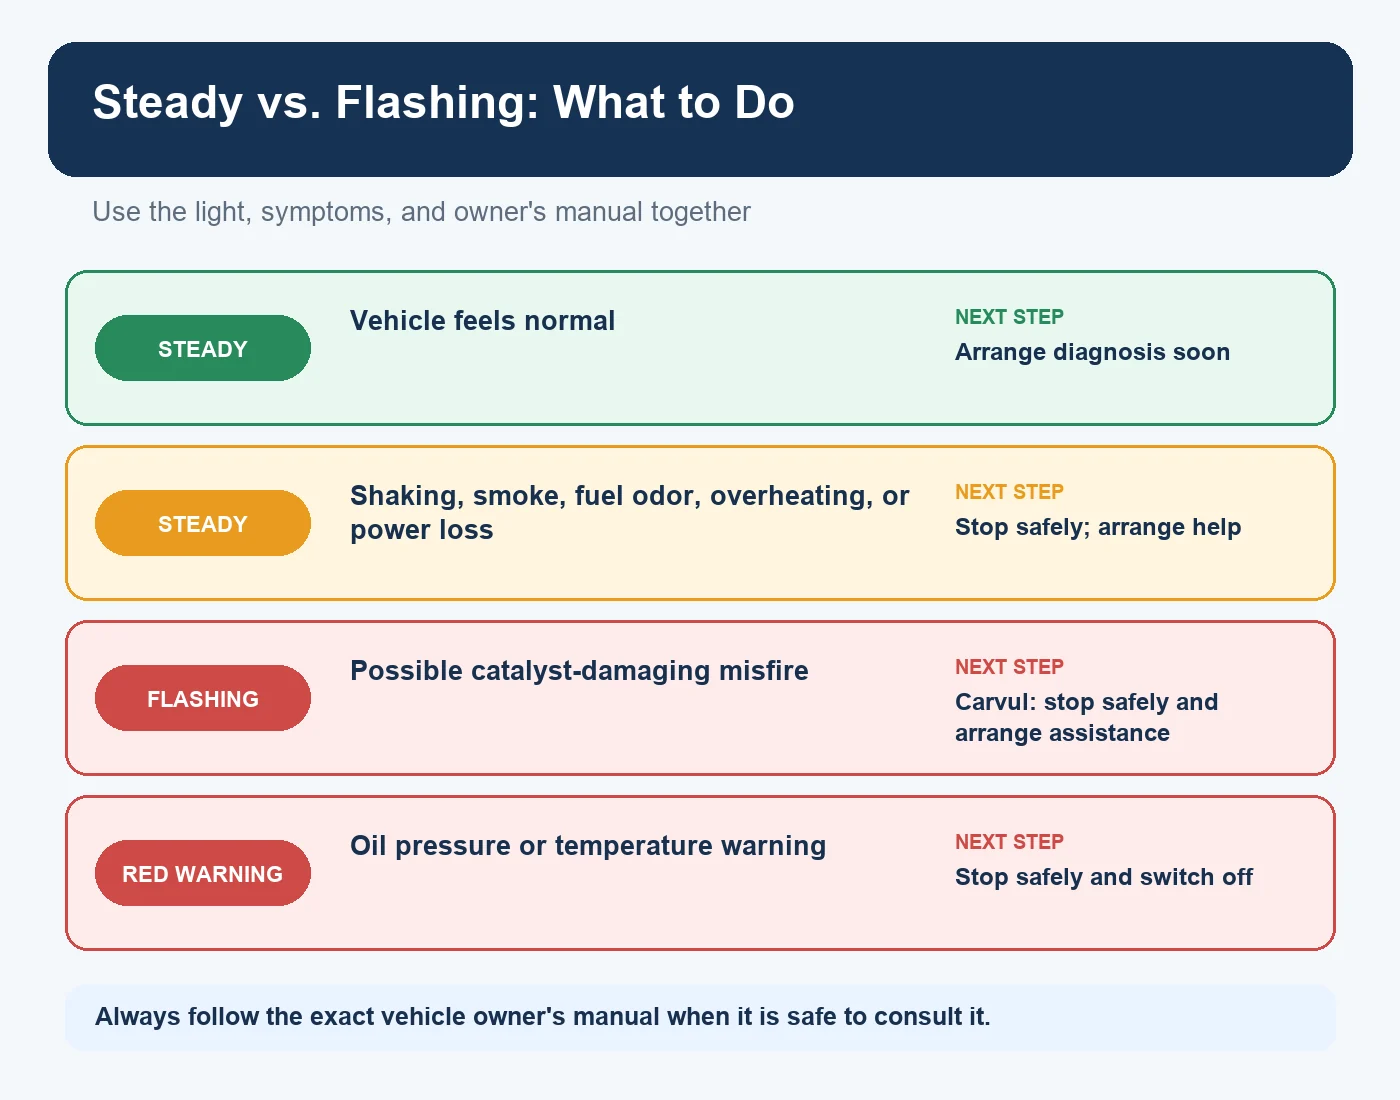
A steady light
A steady check engine light means a fault has been detected and stored or remains active. If the car drives normally and there are no additional warning signs, it may be possible to reach home or a repair facility carefully. It should not be ignored for weeks simply because the car still moves normally.
The EPA notes that a steady light can accompany conditions ranging from a loose or missing fuel cap to a fault that wastes fuel, increases emissions, shortens engine life, or becomes more expensive if neglected. The correct urgency still depends on the accompanying symptoms and the manufacturer’s instructions.
A flashing light
A flashing check engine light deserves a more cautious response. EPA consumer guidance associates a blinking MIL with a severe engine problem such as a catalyst-damaging misfire, while AAA guidance advises drivers to pull off the road safely and arrange immediate assistance.
Carvul’s conservative recommendation is to avoid continued driving, reach a safe location without creating another hazard, switch the vehicle off, and arrange professional assistance. Do not continue at highway speed, tow a trailer, accelerate hard, or repeatedly restart the engine to see whether the flashing stops. A flashing light combined with shaking, loss of power, or a fuel smell makes stopping and arranging a tow especially important. Manufacturer instructions can differ, so follow the owner’s manual for the exact vehicle whenever it is safe to consult it.
The light’s behavior is only one part of the decision. Use it together with the gauges, warning messages, odors, sounds, and changes in how the vehicle runs.
When should you stop driving?
The MIL is not the only information available. Use the entire symptom picture.
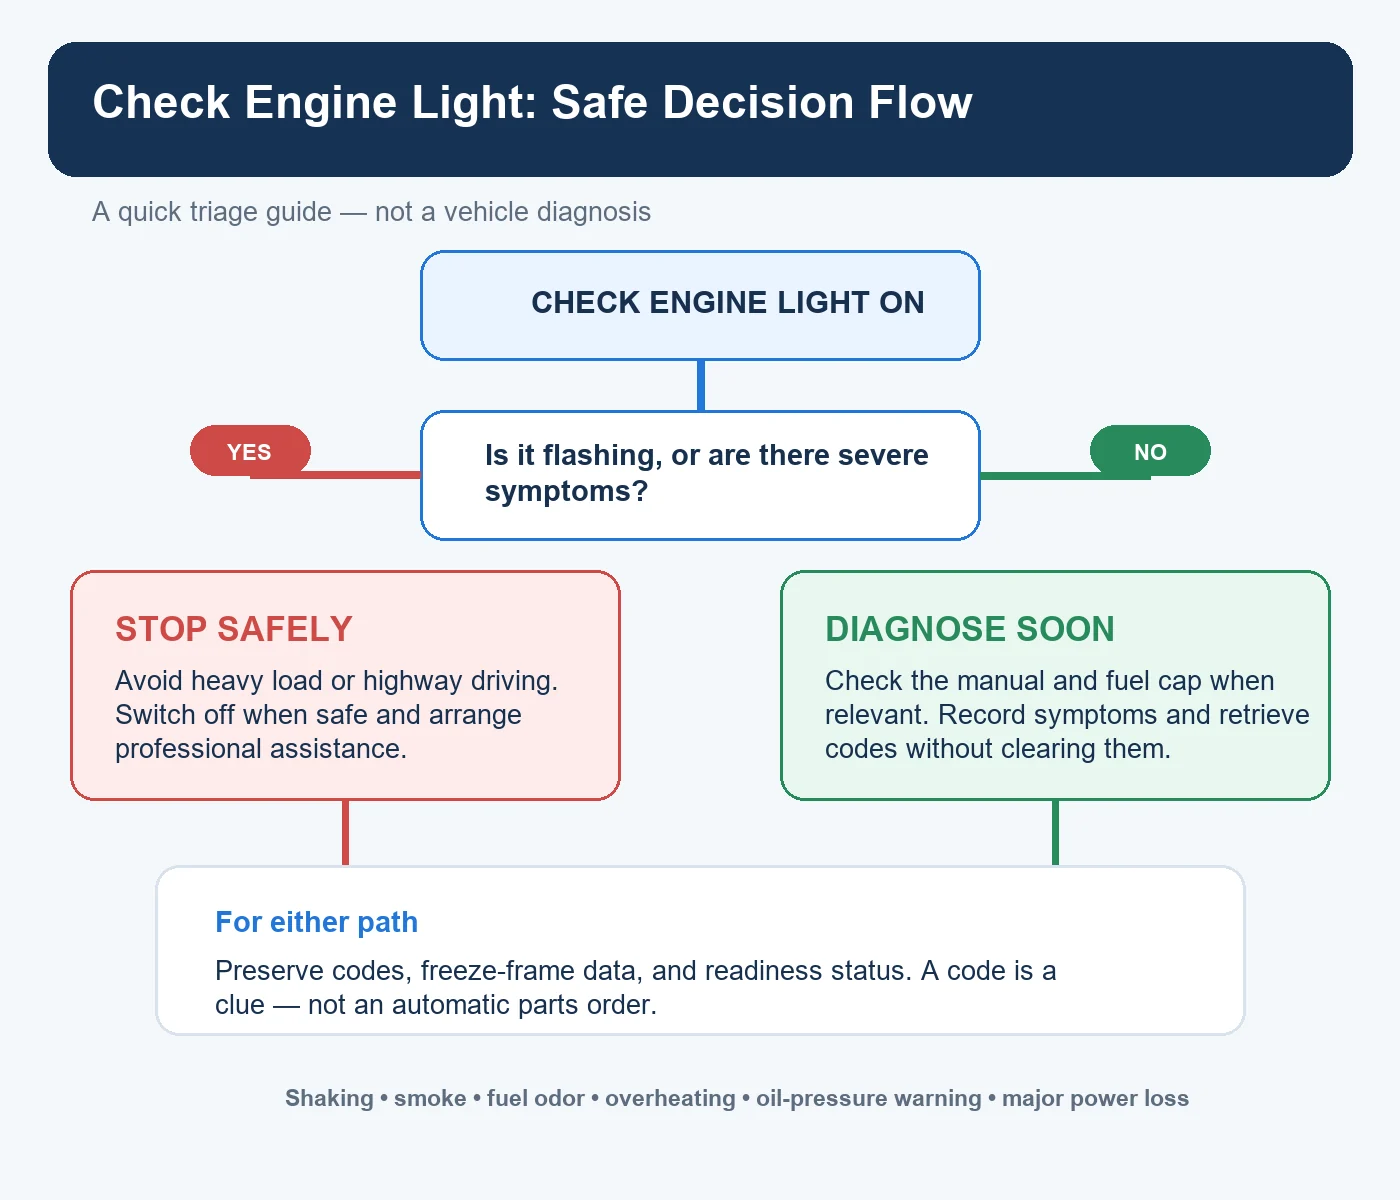
Stop as soon as you can do so safely and consider roadside assistance when any of these conditions appear:
- The check engine light is flashing.
- The engine shakes severely, misfires, stalls, or loses substantial power.
- The temperature gauge is in the hot zone or an overheating warning appears.
- A red oil-pressure warning remains on while the engine runs.
- You see smoke or steam.
- You smell raw fuel, burning insulation, or another strong burning odor.
- The vehicle will not accelerate predictably or cannot maintain a safe road speed.
- Multiple warning lights appear with abnormal steering, braking, or electrical behavior.
If the light is steady, the vehicle feels normal, all gauges read normally, and the manual does not require an immediate stop, avoid heavy loads and arrange diagnosis soon. This is a triage decision, not proof that continued driving is risk-free.
Nine smart steps to take when the light comes on
1. Stay calm and read the road situation
Keep control of the vehicle. Avoid staring at the dashboard or trying to use a phone or scanner while moving. Note whether the light is steady or flashing and move to a safe place if the vehicle behaves abnormally.
2. Check for other warnings
Look at the temperature gauge, oil-pressure warning, charging-system warning, and any vehicle messages. A check engine light paired with overheating or low oil pressure is a different situation from an isolated steady MIL.
3. Record what the vehicle was doing
Write down the speed, engine temperature, fuel level, recent refueling, weather, load, and symptoms. Note whether the problem occurs at idle, during acceleration, after a cold start, or only at highway speed. Intermittent faults are easier to diagnose when the circumstances are documented.
4. Consult the owner’s manual
Manufacturers define warning behavior for each model. The manual may distinguish a steady light from a flashing one, explain whether a message changes the response, and describe the correct fuel-cap procedure. Do not substitute a generic internet instruction for a manufacturer-specific warning.
5. Inspect the fuel cap when appropriate
If the light appeared after refueling and the engine otherwise runs normally, switch the engine off and inspect the cap. Confirm that it is present, correctly seated, and free from obvious seal damage. Tighten it only as directed by the vehicle manufacturer.
A cap check is sensible, but it is not a diagnosis. An evaporative-emissions code can also result from a leak, valve, circuit, or other fault elsewhere in the system. If the warning remains or returns, preserve the diagnostic information and have the vehicle evaluated.
6. Do not disconnect the battery to hide the light
Disconnecting the battery or clearing codes can erase useful diagnostic information, including stored operating conditions used during diagnosis. It can also reset emissions readiness monitors to not ready, creating a separate problem before inspection. EPA OBD inspection guidance identifies battery disconnection and recent code clearing as reasons monitors may be incomplete. Preserve the original codes, readiness status, and freeze-frame data whenever possible.
7. Retrieve the codes safely
A repair shop, dealership, inspection station, or parts retailer may be able to read OBD-II codes. Owners can also use a compatible scanner, but the vehicle should be parked and the manufacturer’s instructions followed. Record all confirmed, pending, and permanent codes along with readiness status and freeze-frame information if available.
8. Diagnose before replacing parts
Use the code to choose tests, not to choose a part automatically. A technician may need a visual inspection, wiring checks, scan-tool live data, smoke testing, fuel-pressure testing, ignition analysis, or manufacturer service information. The required process depends on the code and symptoms.
9. Verify the repair
After the cause is repaired, confirm that the symptom is gone, no relevant codes return, and the required monitors complete. Keep the invoice, code report, test results, and warranty details. For a used car, those records can support future maintenance and resale decisions.
How OBD-II diagnostic trouble codes work
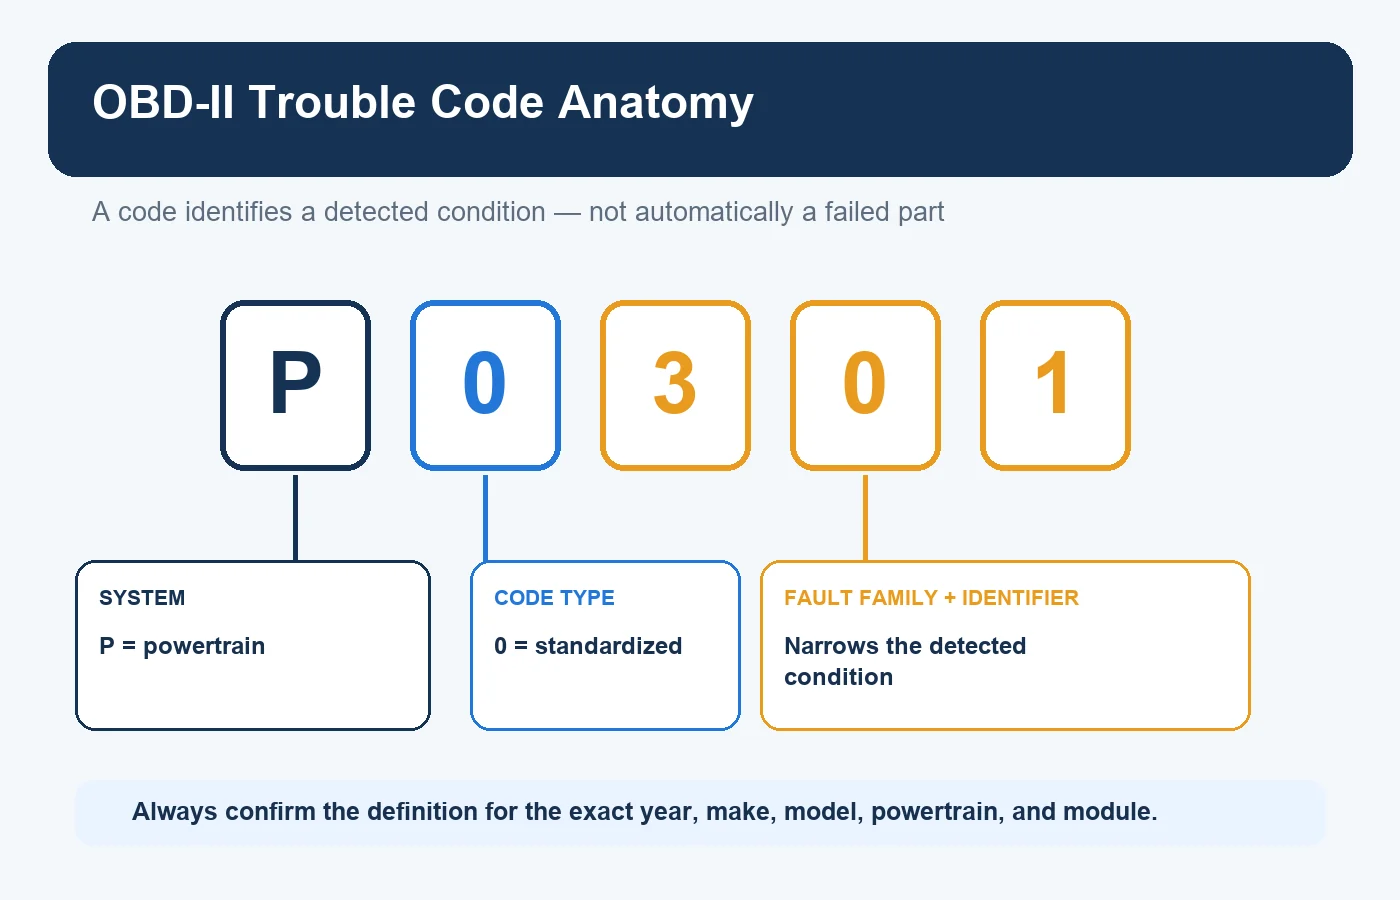
An OBD-II code usually contains one letter and four numbers. The first character identifies a broad system family:
| Prefix | General system family | Important limitation |
|---|---|---|
| P | Powertrain | Can involve engine, transmission, fuel, ignition, or emissions systems |
| B | Body | Coverage and definitions may be manufacturer-specific |
| C | Chassis | May involve systems outside the engine-management scope |
| U | Network communication | Can reflect communication, voltage, wiring, or module issues |
The next character helps distinguish standardized codes from manufacturer-specific ones. The remaining digits narrow the system and fault definition. A code description tells you what the computer observed; it does not provide a complete root-cause analysis. AAA’s OBD code guidance likewise treats a code as a diagnostic clue rather than proof that the component named in a description has failed.
For example, an oxygen-sensor-related code does not automatically prove that the oxygen sensor itself failed. Wiring damage, an exhaust leak, a fuel-control problem, or another condition can produce a reading outside the expected range. Replacing the named component without tests can waste money and leave the light on.
That distinction protects owners from the common “scan, guess, and replace” cycle.
Confirmed, pending, and permanent codes
Not every stored result has the same meaning.
- Confirmed codes have met the system’s criteria for a detected fault and may command the MIL.
- Pending codes indicate that a fault was observed but may need to recur before becoming confirmed.
- Permanent codes generally cannot be removed with an ordinary scan-tool clear command or by disconnecting the battery. The California Bureau of Automotive Repair explains that the underlying problem must first be corrected; the code then clears after the vehicle reruns the relevant monitor without detecting the problem. Supported code types and monitoring conditions vary by vehicle.
Scanner terminology can vary, and manufacturer-specific information may require enhanced equipment. A basic code reader can be useful, but it may not access every module or test result.
Why a free code scan is not a complete diagnosis
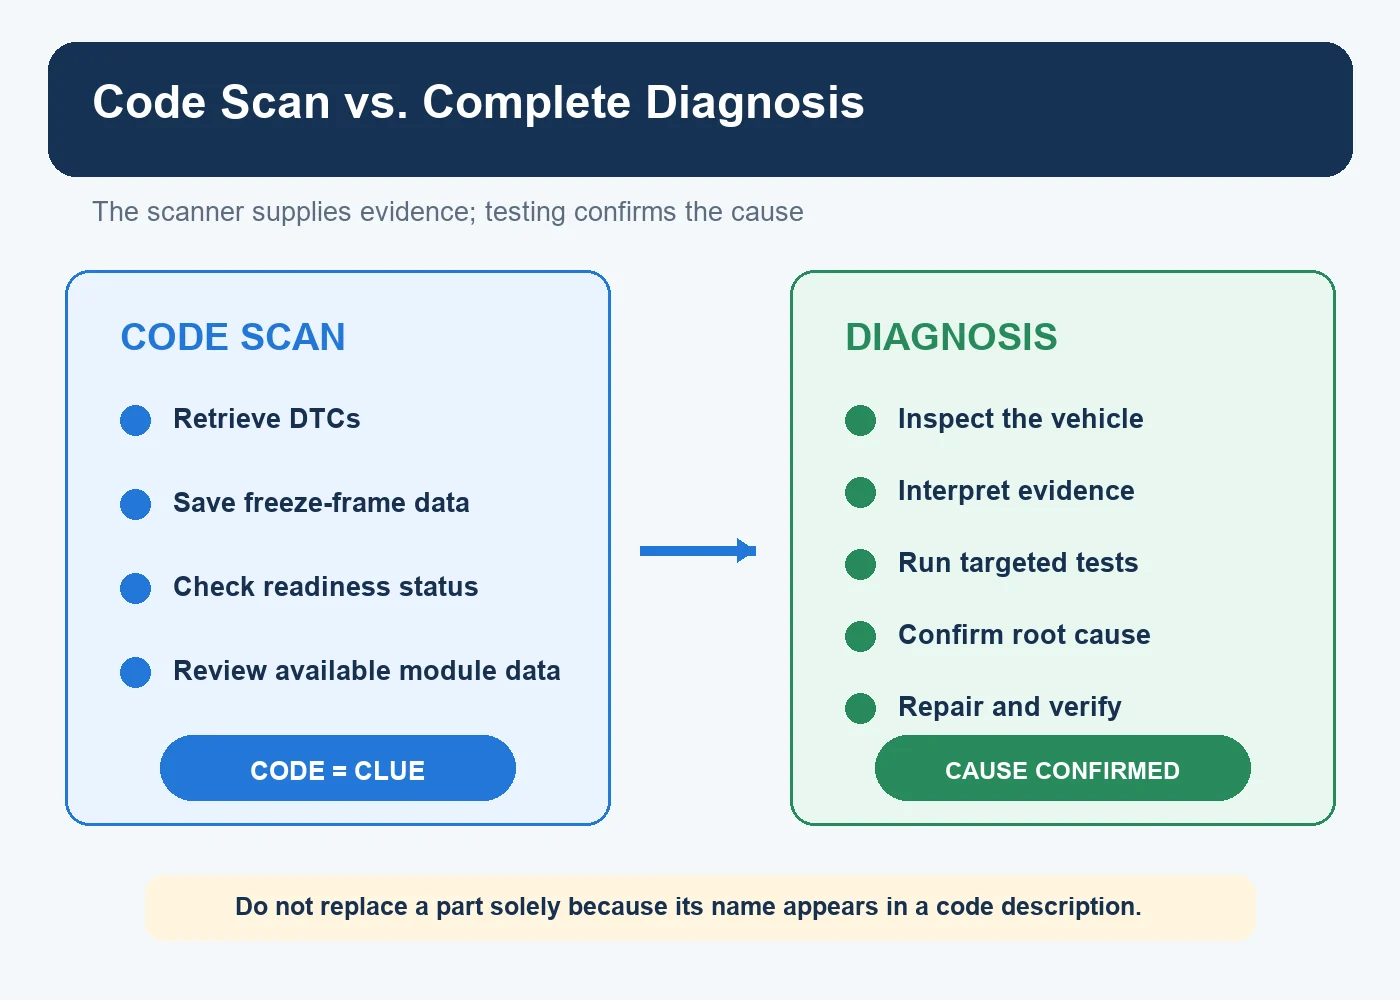
A code scan answers “what did the computer record?” A diagnosis answers “why did it record that?” Those are different questions.
Consider an evaporative-system leak code. The cause might be an improperly sealed cap, a damaged hose, a valve fault, wiring, or another leak. A professional process may include checking the cap and seals, reviewing freeze-frame data, commanding valves with a scan tool, and performing a controlled smoke test. The code identifies the test that failed; the follow-up isolates the cause.
The same principle applies to misfire, catalyst-efficiency, air/fuel, and transmission codes. A parts-store printout can help organize the next step, but it should not be treated as authorization to replace the first listed part.
What a professional check engine light diagnosis should include
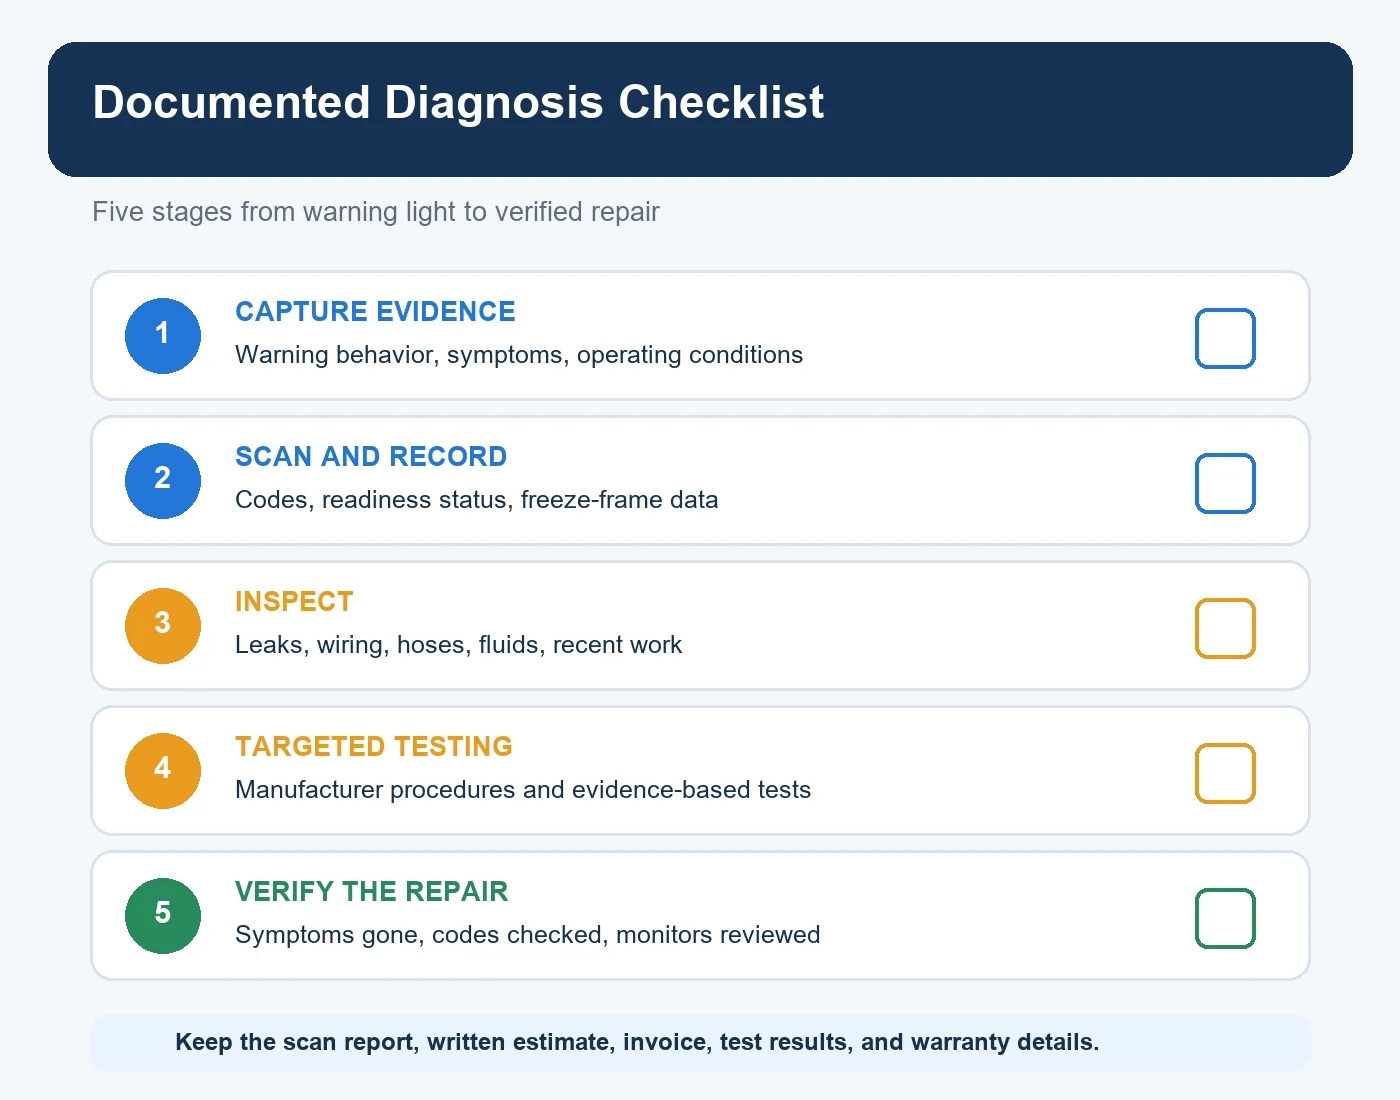
A defensible diagnosis moves through five broad stages:
- Capture evidence: Confirm the warning behavior, symptoms, operating conditions, recent work, and customer observations.
- Scan and record: Save confirmed, pending, and permanent codes, readiness status, freeze-frame data, and relevant module information before clearing anything.
- Inspect: Check for visible leaks, damaged wiring, disconnected hoses, low fluids, loose connections, and problems related to recent service.
- Perform targeted testing: Use manufacturer procedures and the evidence gathered to select appropriate electrical, mechanical, pressure, leak, or functional tests rather than guessing at parts.
- Verify the repair: Confirm that the symptom is gone, relevant codes do not return, applicable monitors run, and the completed work is documented.
Ask the shop which test confirmed the failed part. “The code said so” is not a complete answer. A written estimate should separate diagnostic labor, parts, repair labor, taxes and fees, and any additional work that depends on inspection.
What to bring to the appointment
Useful records can shorten the path from a warning light to a defensible diagnosis. Bring the code printout if the vehicle was scanned, but tell the shop whether anyone cleared the codes afterward. Include recent repair invoices, battery-replacement records, emissions-test results, and notes about when the warning appears.
Describe symptoms in observable terms. “The engine shook for 20 seconds after a cold start” is more useful than “the engine sounded bad.” Note whether the fuel tank had just been filled, whether rain or a car wash preceded the fault, and whether the light appeared under acceleration, at idle, or after recent service.
Do not direct the technician to replace a part based only on an online search. Ask for the original scan results, the test that isolated the cause, and the post-repair verification. If the diagnosis involves an intermittent electrical or emissions fault, ask what evidence would justify returning for additional testing if the light comes back.
Check engine light repair-cost considerations
There is no honest universal price for a check engine light repair. The same warning can result from a cap that was not sealed, damaged wiring, an ignition fault, an evaporative leak, a sensor circuit, internal engine trouble, or a transmission problem. Vehicle design, access, labor rates, diagnostic time, parts availability, and related damage all affect the final amount.
Instead of relying on a broad online price, ask:
- Is the diagnostic fee applied to the repair?
- What test confirmed the proposed cause?
- Is the quote for an original-equipment, aftermarket, remanufactured, or used part?
- Does the estimate include related gaskets, fluids, programming, calibration, or emissions testing?
- What warranty covers parts and labor?
- What happens if the light returns with the same code?
- Are any additional repairs recommendations, or are they necessary to correct this fault?
For budgeting context, use Carvul’s used-car maintenance cost guide. Treat it as planning guidance, not a quote for a specific diagnosis.
Emissions inspections and readiness monitors
Many state inspection programs use OBD information. Exact rules vary by state, vehicle year, fuel type, and program, so confirm requirements with the relevant state agency.
Readiness monitors show whether the vehicle has completed its self-tests for supported emissions systems. Ready means a test has completed; it does not by itself mean the vehicle passed every requirement. Not ready means the test has not completed, so the system may not yet know whether a fault exists.
Clearing codes or disconnecting the battery can reset monitors. EPA OBD inspection guidance lists recent battery disconnection, code clearing, repairs, and failure to operate under required conditions among reasons monitors may remain not ready. A vehicle can therefore arrive at inspection with the light off but still be rejected because too many monitors are incomplete under the applicable state program.
Do not follow a generic “drive cycle” from an unrelated model. Required conditions differ. Use the owner’s manual, manufacturer service information, repair facility guidance, or the state inspection program. Repair the actual fault before attempting to complete readiness monitors.
Buying a used car with a check engine light
A warning light on a vehicle for sale deserves documentation, not reassurance. Do not accept “it is only a sensor” or “it just needs a reset” without evidence.
Before buying:
- Verify that the MIL illuminates during the startup bulb check.
- Scan for confirmed, pending, and permanent codes.
- Review readiness-monitor status; multiple not-ready monitors can indicate a recent reset.
- Compare the seller’s explanation with service records and an independent inspection.
- Confirm whether the vehicle must pass an emissions inspection for registration in your state.
- Obtain a written diagnosis and estimate before negotiating.
- Walk away when the seller refuses an independent inspection or code scan.
Use Carvul’s used-car inspection checklist to evaluate the rest of the vehicle. A code scan does not replace a mechanical inspection, road test, title review, or recall check.
Related symptoms and Carvul maintenance guides
The warning light should be interpreted with the symptoms around it:
- Misfire, rough idle, hard starting, or overdue ignition service: review the spark plug replacement guide, but do not assume plugs are the cause without diagnosis.
- Delayed engagement, slipping, or abnormal shifting: see the transmission fluid and warning-sign guide.
- Overheating or coolant loss: use the coolant service warning signs and stop driving when the temperature warning requires it.
- Starting or charging concerns: compare the battery replacement checks.
- High-mileage maintenance questions: review the 100,000-mile maintenance checklist.
These pages explain related systems. None can identify the cause of a specific warning without vehicle-level evidence.
Common mistakes to avoid
Replacing the part named in the code
Code descriptions identify a circuit, system, or detected condition. They do not always identify a defective part.
Clearing codes before recording them
Clearing can erase freeze-frame data and reset readiness monitors, making diagnosis and inspection preparation harder. The EPA’s OBD test procedures describe storage of diagnostic codes and engine operating conditions and the use of readiness status during inspection.
Assuming a tightened fuel cap solved everything
The cap is one possible source of an evaporative leak. If the warning remains or returns, diagnose it.
Continuing to drive with severe symptoms
A steady light does not make shaking, smoke, overheating, or oil-pressure loss safe. Respond to the complete symptom set.
Trusting a universal repair-price promise
The required repair cannot be priced accurately until the fault is diagnosed for the exact vehicle.
Frequently asked questions
Can I drive with the check engine light on?
It depends on whether the light is steady or flashing, the owner’s-manual instructions, and the vehicle’s behavior. A steady isolated light may allow careful travel for diagnosis. A flashing light or serious accompanying symptom calls for a safe stop and prompt assistance.
What is the most common cause of a check engine light?
There is no single cause that applies reliably to every vehicle. Fuel-cap and evaporative-system faults are common possibilities, but ignition, fuel-control, sensor, emissions, wiring, engine, and transmission faults can also trigger the MIL. Retrieve the codes and test the indicated system.
Will tightening the gas cap turn the light off immediately?
Not necessarily. The computer may need to rerun the evaporative-system monitor under specific conditions before it confirms that the fault is gone. If the cap is damaged or another leak exists, the warning may remain or return.
Can an oil change cause a check engine light?
An oil change does not normally require the MIL to illuminate. A disconnected connector, disturbed hose, incorrect oil level, unrelated fault, or maintenance reminder can appear around the same time. Check the oil level according to the manual and distinguish the MIL from the oil-pressure warning and maintenance reminder.
Does a code reader tell me what part to replace?
No. It retrieves diagnostic information. The code must be interpreted with symptoms, freeze-frame data, live readings, wiring diagrams, service information, and targeted tests.
Can I pass emissions testing after clearing the light?
Clearing the light does not repair the fault and can reset readiness monitors. Depending on state rules, the vehicle may be rejected as not ready or fail when the fault returns. Repair first, then verify readiness properly.
Why did the light turn off by itself?
Some faults are intermittent. If the required number of trips occurs without the fault recurring, the computer may turn the MIL off while retaining diagnostic history. A scan may still reveal useful information.
Is “Service Engine Soon” the same as “Check Engine”?
Sometimes, but not on every vehicle. EPA materials recognize “Service Engine Soon” as one possible MIL label, while some manufacturers also use separate maintenance reminders. Check the exact owner’s manual and symbol rather than relying on the words alone.
Final check engine light action checklist
- Note whether the light is steady or flashing.
- Check temperature, oil-pressure, charging, and other warnings.
- Respond to shaking, smoke, odors, power loss, or overheating.
- Stop in a safe place when the warning or symptoms require it.
- Record when and how the fault appeared.
- Follow the owner’s manual for the exact vehicle.
- Check the fuel cap only when it is safe and relevant.
- Preserve codes, freeze-frame data, and readiness information.
- Use codes to guide testing, not automatic parts replacement.
- Get a written diagnosis and itemized estimate.
- Verify the repair and monitor status.
- Keep the records with the vehicle’s maintenance history.
Sources and editorial scope
This article provides general U.S. consumer guidance. It does not diagnose a specific vehicle or replace its owner’s manual, manufacturer service information, or an inspection by a qualified technician.
- U.S. EPA: What to Do With the Check Engine Light
- U.S. EPA: OBD Inspection and Maintenance Technical Guidance
- U.S. EPA: Vehicle Inspection and Maintenance Policy and Technical Guidance
- California Bureau of Automotive Repair: Permanent Diagnostic Trouble Codes
- AAA: Onboard Diagnostics Code Translator and Consumer Guidance
- AAA: Check Engine Light Response Guidance
- AAA: Common Car Problems and Check Engine Light Guidance
- Toyota Owners: Example of Manufacturer-Specific Warning-Message Guidance