
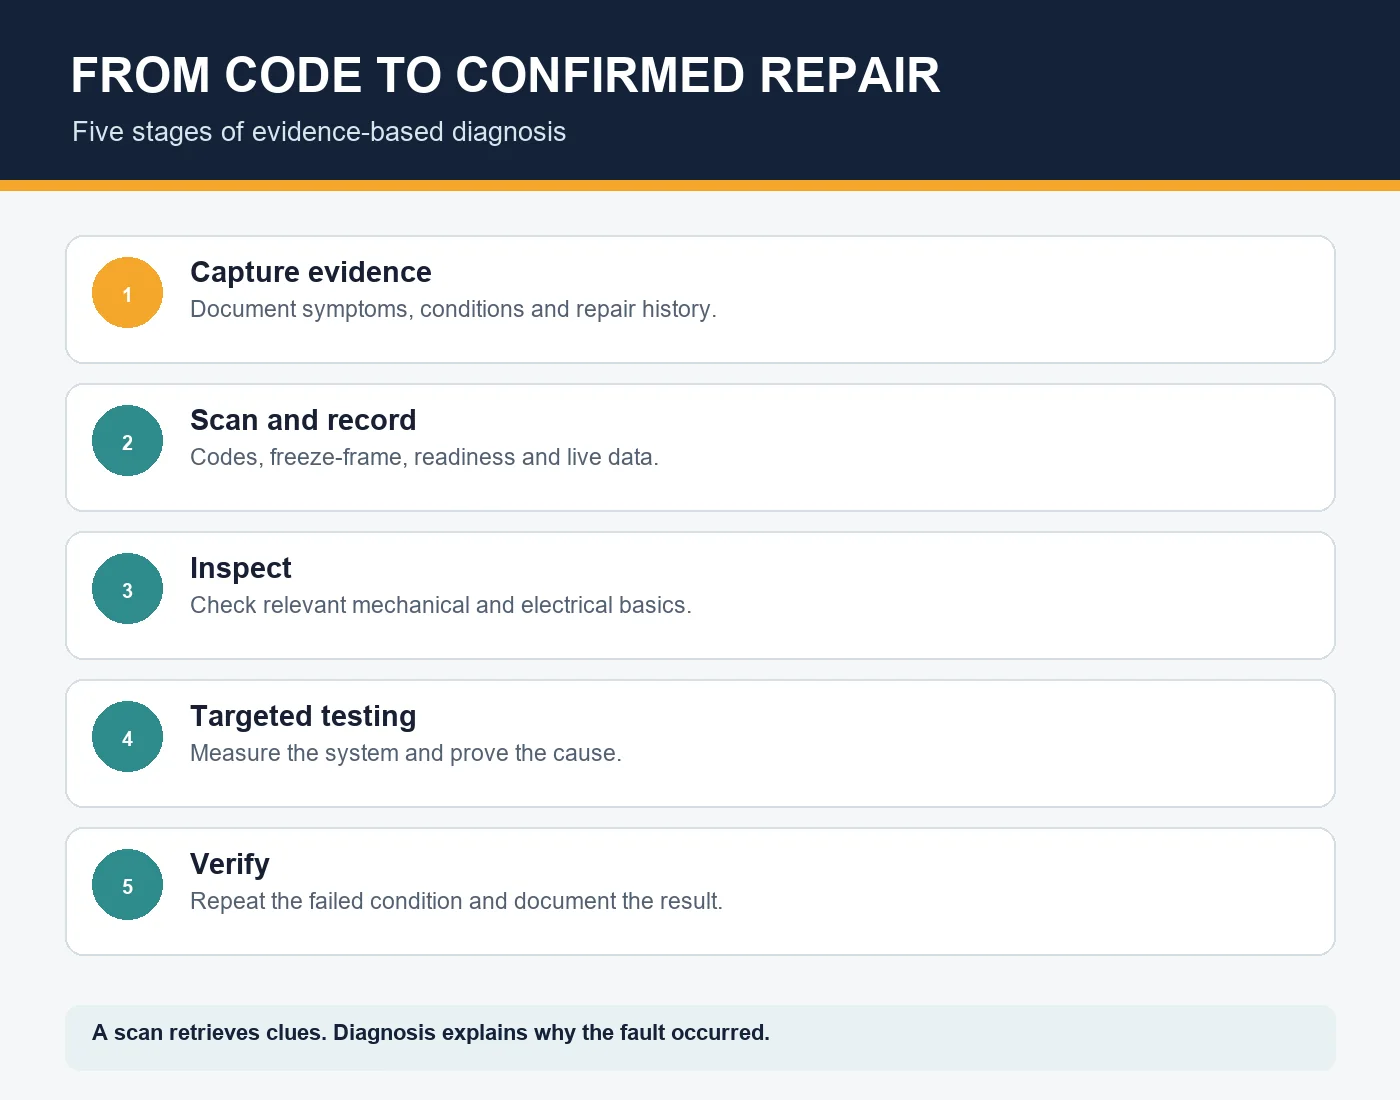
Quick answer: A professional check engine light diagnostic process has five stages: capture evidence, scan and record, inspect the vehicle, perform targeted tests, and verify the repair. Reading a diagnostic trouble code is only the beginning. The goal is to prove the failed condition and confirm that the repair restored normal operation.
Drivers are often offered a “free scan,” but a scan and a diagnosis are different services. The scanner communicates with the vehicle. Diagnosis combines that information with symptoms, technical documentation, inspection, measurements, and verification.
Use Carvul’s check engine light guide first if you need help deciding whether the warning is urgent.
Check Engine Light Diagnostic Process: Scan vs Diagnosis
| Scan | Diagnosis |
|---|---|
| Retrieves codes and selected data | Explains why the monitored fault occurred |
| May take minutes | Time depends on access and complexity |
| Provides a system direction | Tests components, circuits, and mechanical conditions |
| Does not guarantee a repair answer | Produces evidence for a repair recommendation |
| Cannot verify a repair by itself | Includes post-repair checks |
Stage 1: Capture the evidence
The process starts before anything is cleared. Record the customer’s description, warning behavior, operating conditions, recent repairs, battery events, refueling, weather, and whether the problem occurs hot, cold, at idle, under load, or at a certain speed.
The technician should confirm safety concerns. A flashing light, severe shaking, smoke, overheating, low oil pressure, or fuel leakage changes the plan. A road test should never be used when the vehicle is unsafe.
Evidence can include photographs, sound or vibration descriptions, repair history, technical service information, and the exact owner’s-manual warning. Good intake questions reduce time spent chasing a fault that cannot be reproduced.
Stage 2: Scan and record
A capable scan retrieves more than one code list. Depending on the vehicle, the technician may record:
- current, pending, history, and permanent DTCs;
- freeze-frame data;
- readiness-monitor status;
- live sensor and calculated data;
- misfire counters;
- fuel trims;
- module communication faults;
- manufacturer-enhanced data and test results.
Codes must be interpreted using the correct year, make, model, engine, calibration, and service information. A generic description may omit manufacturer-specific diagnostic detail.
The scan should be saved before codes are cleared. Clearing can remove evidence and reset readiness monitors. It is not a diagnostic test unless the service procedure uses it at a defined stage.
Stage 3: Inspect before replacing
Visual and basic inspections can reveal disconnected hoses, damaged wiring, loose grounds, fluid contamination, incorrect parts, rodent damage, aftermarket modifications, exhaust leaks, low fluid levels, or evidence of previous work.
The inspection follows the code and symptom. An EVAP fault calls for different checks than a cylinder misfire. A circuit code requires power, ground, connector, wiring, and signal evaluation rather than automatic sensor replacement.
Basic mechanical condition also matters. A control system cannot correct a cylinder with poor compression, incorrect mechanical timing, or a major air leak.
Stage 4: Perform targeted testing
Targeted tests are chosen to separate plausible causes. Examples may include electrical measurements, waveform analysis, pressure or vacuum tests, smoke testing with approved equipment, injector balance, relative compression, leak-down testing, fuel-quality checks, or commanded actuator tests.
The exact procedure belongs to trained personnel with the correct equipment and service information. This article is not a substitute for repair instructions. The important consumer question is: What test result proves this recommendation?
A useful estimate should distinguish diagnostic labor from repair labor. It should name the confirmed fault, affected component or circuit, related damage, parts, labor, taxes, and verification plan. “Code says sensor” is not enough.
Stage 5: Verify the repair
After the repair, the technician confirms that the original symptom is gone and that relevant data is normal. Verification may include clearing codes as directed, completing relearns, repeating the failed test, performing a safe road test, and allowing the monitor to run.
The final scan should look for returning current or pending codes and document readiness. Permanent DTCs can remain until the monitor confirms the problem is corrected under required conditions; ordinary clearing does not remove them.
A practical example: lean code at idle
Suppose a vehicle stores a lean-condition code. Replacing an oxygen sensor because it reports lean ignores several possibilities. The diagnostic process might compare fuel trims at idle and higher engine speed, inspect intake ducts, test for unmetered air, check fuel pressure, inspect exhaust leakage, evaluate sensor signals, and review freeze-frame load and temperature.
If fuel trims improve away from idle and a smoke test finds an intake leak, the evidence supports repairing that leak. If pressure is low under load, the direction changes. The same code can lead to different repairs because the cause belongs to the vehicle, not the code label.
A practical example: cylinder misfire
A cylinder-specific misfire code can involve ignition, fuel, compression, wiring, or mechanical timing. A technician may inspect the plug and coil, compare cylinder behavior, test injector control, and evaluate compression. Moving a component between cylinders can sometimes be part of a controlled test, but only when service information and safety procedures allow it.
The repair is verified under the conditions that originally triggered the fault. Simply seeing the light off at idle is weak evidence if the misfire occurred only during acceleration.
What affects diagnostic cost?
Diagnostic charges vary with local labor rates, access, required equipment, intermittent behavior, previous repairs, and the number of systems involved. A fixed code-read fee should not be compared directly with several hours of electrical or drivability testing.
Before authorizing work, ask:
- What is included in the diagnostic charge?
- Will additional testing require approval?
- Is any portion credited toward the repair?
- What evidence will be provided?
- Is post-repair verification included?
- What warranty applies to diagnosis and repair?
Red flags in a diagnostic recommendation
- The shop names a part from the code without testing.
- Codes were cleared before being documented.
- The estimate does not separate diagnosis and repair.
- Several unrelated parts are proposed “to see what works.”
- No one asks about operating conditions or symptoms.
- The repaired vehicle is returned without verification notes.
- A flashing light is treated as a routine maintenance reminder.
How owners can prepare for the appointment
Write down when the warning started, whether it flashes, all other warnings, recent service, fuel purchases, weather, and the exact symptoms. Bring service records and keep the fuel level reasonably representative unless the shop instructs otherwise. Do not clear the codes immediately before the visit.
For intermittent problems, a short factual log is better than trying to reproduce the fault aggressively. Record date, outside temperature, engine temperature, speed, load, and duration while prioritizing safe driving.
Frequently asked questions
How long does diagnosis take?
It depends on access, test conditions, and whether the fault is present. A simple visible defect may be quick; an intermittent wiring or network fault can require substantial time.
Is a free code scan enough?
It can identify a diagnostic direction but normally does not establish root cause or verify a repair.
Should I approve the part the scanner recommends?
Scanners may display common fixes or code descriptions. Treat them as reference information, not proof. Ask for vehicle-specific test results.
Can I diagnose the light myself?
Owners can safely record symptoms and scan information, but testing may involve hot, moving, high-voltage, fuel, or pressurized systems. Use the service manual and qualified help when the procedure exceeds your tools or training.
What if no codes are stored?
Confirm that the warning was actually the MIL, check all modules with suitable equipment, and investigate intermittent power, communication, cluster, or recently cleared conditions. The exact vehicle documentation matters.
Choosing the correct diagnostic starting point
Technicians often prioritize codes and symptoms that can create other codes. Low system voltage, communication loss, mechanical timing, or a major air leak can produce several downstream results. Service information may specify an order for testing.
The oldest code is not automatically the root cause, and the code with the lowest number is not automatically first. Priority depends on status, freeze-frame, symptoms, technical documentation, and whether one fault can explain the others.
Electrical testing without guesswork
Electrical diagnosis checks the complete circuit: power source, protection, load, control, ground, connectors, wiring, and module command. A voltage reading with the circuit unloaded may look normal even when corrosion prevents adequate current. The correct test can include voltage drop, current, resistance under specified conditions, or waveform analysis.
Back-probing, piercing insulation, or applying power incorrectly can damage terminals or modules. Qualified technicians use approved adapters and procedures. A sensor code is not permission to substitute parts for circuit testing.
Mechanical testing when electronics are reporting the symptom
Computers can detect the result of poor compression, valve timing, vacuum leakage, exhaust restriction, or oil-control problems without directly identifying the mechanical cause. When data points toward a cylinder or airflow imbalance, mechanical tests may be necessary.
Compression, leak-down, relative compression, vacuum, pressure, and timing checks answer different questions. Results must be compared with specifications and neighboring cylinders. One number without test conditions is weak evidence.
Intermittent faults and the value of a test plan
An intermittent warning can be difficult because the vehicle may behave normally in the bay. Freeze-frame, failure records, wiring diagrams, technical bulletins, and customer observations guide the plan. A technician may monitor data, inspect harness routing, reproduce temperature or vibration conditions safely, or use recording equipment.
Randomly moving connectors can temporarily hide the fault. Any manipulation should be documented so the result can be repeated and the repair verified.
Manufacturer information and technical bulletins
Factory service information supplies connector views, pin assignments, operating descriptions, specifications, test steps, calibration notes, and special-tool requirements. Technical service bulletins can describe known patterns and updated procedures, but a bulletin is not proof that every vehicle has that condition.
The technician should verify applicability by VIN, build date, engine, calibration, symptoms, and codes. Recalls and warranty extensions are separate from ordinary bulletins and should be checked through official manufacturer or NHTSA resources.
Diagnosis after someone already replaced parts
Previous repairs can complicate the evidence. The replacement part may be incorrect, defective, poorly installed, or unrelated. Connectors may be damaged and codes may have been cleared. Give the new technician every invoice and the original code report.
The process may need to re-establish a known baseline: correct parts, routing, grounds, fluid levels, calibration, and mechanical condition. Avoid authorizing another chain of parts without a revised test plan.
Evaluating the final diagnostic report
A useful report should answer:
- What was the customer’s verified complaint?
- Which codes and data were recorded before clearing?
- What inspection findings mattered?
- Which tests were performed and what were the results?
- What root cause was confirmed?
- What repair was completed?
- How was the repair verified?
- What monitor or permanent-code status remains?
The report need not contain every technician note, but it should provide enough evidence to explain why the repair was reasonable.
Second opinions and unresolved diagnosis
A second opinion is appropriate when the estimate is expensive, the evidence is unclear, repeated repairs failed, or major engine or emissions components are recommended. Ask for the scan report and test results before moving the vehicle.
An honest shop may report that the fault could not be reproduced. That is better than an unsupported part replacement. Agree on the next evidence-gathering step, warning conditions that require stopping, and whether the vehicle is safe to operate.
Hybrid, diesel, and manufacturer-enhanced considerations
Hybrid vehicles combine conventional engine diagnostics with high-voltage and hybrid controls. Diesel systems can include particulate filters, selective catalytic reduction, exhaust-temperature sensing, and manufacturer-specific service routines. Generic code readers may not provide enough coverage.
High-voltage, high-pressure fuel, hot exhaust, and automated restart systems require specific training and safety procedures. The five-stage logic remains valid, but the tools and risks change.
Diagnostic checklist for consumers
Before the appointment:
- preserve warnings and scan information;
- write down operating conditions;
- collect service and repair records;
- disclose modifications and recent battery work;
- avoid clearing codes.
During authorization:
- ask what the diagnostic charge covers;
- approve additional time in stages;
- request evidence before parts;
- separate maintenance from fault repair;
- ask how verification will be documented.
After repair:
- review the final code report;
- confirm the original symptom is gone;
- understand readiness and permanent-code status;
- keep the invoice and warranty;
- return promptly if the warning or symptom recurs.
More diagnostic-process questions
Can two shops reach different conclusions?
Yes, especially with intermittent faults or incomplete evidence. Compare the tests performed and measured results, not just the proposed parts.
Why does diagnosis cost money if the scanner shows a code?
The scan identifies a direction. Diagnostic labor isolates the cause through inspection, research, access, measurement, and verification.
Can a software update fix a warning?
Some manufacturer procedures include calibration updates, but applicability must be verified. Software should not be used to conceal a mechanical or electrical fault.
What does “no fault found” mean?
It can mean the concern was not present or the available evidence was insufficient during that visit. Ask what was checked and what information to collect if it returns.
Should the shop clear every module?
Not automatically. Information in other modules may help explain the event. Clearing should be purposeful and documented.
What if the code points to an emissions component under warranty?
Verify eligibility using the VIN, in-service date, mileage, component, federal or state emissions provisions, and manufacturer terms before authorizing customer-paid work.
What should a check engine light diagnostic process include?
A check engine light diagnostic process should preserve evidence, record codes and data, inspect relevant systems, perform targeted tests and verify the repair under appropriate conditions.
Related Carvul Guidance
Continue with check engine light cause categories and resetting a check engine light after repair for the next step in the diagnostic process.
Bottom line
A check engine light diagnostic process is complete only when evidence supports the cause and the repair is verified.
Professional diagnosis turns a code into evidence. Capture the conditions, record the data, inspect the vehicle, test the leading causes, and verify the repair. That process protects the customer from guesswork and gives the shop a defensible repair plan.
Authoritative sources
- U.S. EPA: On-Board Diagnostics questions and answers
- California BAR: Automotive Repair and Smog Check resources
- Manufacturer service information and procedures for the exact vehicle